Tuesday, October 6, 2020

Get Boo-ing 2020

 It's my favorite time of year.  Halloween!  You know me and costumes!!  And being extra!!!  And gift giveaway planning!!!!


All these factors combined, obviously I can't wait each year to kick off the boo-ing tradition my neighborhood.  If you're not familiar with the boo concept, here's the summary:


There seems to be a relatively good boo basket participation in my neighborhood, though in 2019 I never got a basket myself (whomp whomp - oh well).  Since I love giving these out, I could care less though if I get anything in return.

Here's the two baskets I pulled together for 2020.  I bought the tin boo buckets at the end of 2018 on clearance not thinking about the fact that I can't use them on the same people that I've already "boo'd", so I had to skip using it for one of the two houses.


The second gift, in the orange bag, was supposed to be a transplanted aloe in a skeleton head planter, but I've been having an issue with the plants in my house (we apparently picked up fungus gnats from a new plant we added to our collection late spring/early summer - a super huge pain in the ass).  Rather than gift the plant and potentially spread that issue to someone else's house plants, I added a note to the gift that the plant would come later.  Hopefully before month end I will have a transplant aloe I can gift them.  If not, I will empty and sanitize the planter and fill it with a new plant from the local nursery.

Now I wait to see ... did my excitement catch again this year?  Will boo-ing spread through the neighborhood?

If I get a boo basket myself, I'll be sure to update!  :-)


---


Do you boo in your neighborhood?  What kind of basket do you build?  Add your comments below!


Tuesday, July 28, 2020

Art Journaling

With everything going on these days, lately I've been feeling like ... I need something else in life.  

Being stuck at home is stale.  Granted my state is open for most things, but I am not about to join the masses who are choosing to self sacrifice right now.  

Things feel even more stale on days where it's super hot or rainy outside and I am stuck indoors.  And being it's summer in Minnesota, that happens quite a lot.  Not that I am complaining, I would take summer over winter right now, that's for sure!!!

After a couple of weeks of that good ol' stale feeling, in June I started looking for another creative outlet besides cross stitching (and no I don't mean self barbering - which yes I am doing for my entire family including myself).  This is how I ended up challenging my sister's kids into art journaling.  

Here's how it works:

(1) Each week, one of the three of us comes up with a theme word.  Then, we create.  

(2) Since I'm Auntie, I get to make 2 pieces (one for each kid).  I've been making most of my works on textured card stock that I had left over from ... true story, making stuff for my wedding about 15 years ago (face palm).  The card stock is 8.5x11", and I slice each sheet in half for a finished work size of about 5.5x8.5".  Mediums used each week vary based on my mood and the theme, but mostly I use acrylic paint, watercolor, marker or colored pencils.

(3) I throw my finished works in a mailer when I know the kids are close to completing their works.  I use this envelope as an inner to protect each work, and just for fun I close the inner with a wax seal.  I use this envelope as the mailer.  USPS confirmed that I can use 3 standard forever stamps to put this in the mail, in case you're curious.

(4) When the kids finish their works, it's time to unveil what came in the mail.  Though I've been told it's quite a process opening my works, as the kids try to salvage each wax seal LOL.  Once opened, each work slides into a plastic protective sheet in a mini 3 ring binder, and a printed label with the theme word is affixed to the bottom right of the plastic sleeve.

And that's it - pretty easy!

While I may not be making 100% original works, since I use Google and YouTube for inspiration, the new creative outlet has helped improve my mood and gives me something new to look forward to each week.  And since I'm crafty, my investment has been minimal, as I already have a ton of art supplies in my house.  So, the real win is, I can finally brush the dust off my supplies and put them to work again.

With the above explanation complete, let's get to the fun part of this post.  Here's what I've made so far, with theme noted above each picture.

And before I go ... if this inspires you and you begin to do something similar, post links to your finished works in the comments below!


Sky

Watercolor, Marker & Colored Pencil


Joy

Acrylic Paint


Nature

Sharpie Marker


Mystic

Acrylic Paint


YouTube

Acrylic Paint / Tutorial on YouTube


Tuesday, May 19, 2020

Current Stichin' Projects - Winter/Spring 2020

Since early 2019, I've been quite prolific in creating cross stitch works.  You've already seen some of what I've made in previous posts, but today I've got more to add to the collection (in rough chronological order).

Before I bombard you with photos - yes, I would be happy to make something via request ... pending size and subject matter.  Meaning: I don't want to take on anything too huge, and want to make sure it would be something fun for me to make as well.  

If you have something in mind, let's chat!


---


Wrapping up with Valentine's Day, I finished a cross stitch for my husband.  Usually I don't give him stuff like this, but I ended up with a 2020 copy of Cross Stitch Magazine and this pattern was in it, so I couldn't resist.


After completing the above, I had some various scrap threads and a hunk of fabric left over.  Knowing I had to mail a payment to a tour guide for an upcoming visit to Salem, I threw this in the envelope.  Of course, things have changed quite a bit since I mailed this, and my trip was totally cancelled, but ... the art remains anyway!  :-)


Still behind in my abstract horse, I took a break on that and made a bookmark gift for a Reddit exchange.


Then I finally got around to killing that damn horse project (every crafter out there knows how much fun it is to start something new, but sometimes the loss of focus that happens when you're close to finishing).


Of course, I finished the horse MOSTLY because this wonderful thing called "stay at home orders" surfaced, which means I had nothing but time on my hands ... queue me pumping out a backlog of squirreled away patterns.


I particularly like how Rosie turned out, because her back stitching details were so intricate.


Foot note: the white knots on her headband were my later addition, I felt like she just wasn't quite Rosie without them.


Among the above, I also started my largest project to date, a gift requested by a coworker of mine.  While I've made it abundantly clear it will be done no time soon, here's my progression so far:


And that's about all for now ... lol, like the above was a small feat.  Ha!  More updates to come, as isolation doesn't seem to be ending any time soon!

Tuesday, May 12, 2020

Recipe: Delicious Breakfast - Overnight Cinnamon Rolls

While most of my recipes on this blog are fairly healthy, I'm going to post this one with the premise that it is obviously ... uh ...


As I mentioned in the pizza crust post, we are now the proud owners of a slowly consumed 2 lb block of yeast.  And being stuck in isolation during both my son and my birthdays, I simply decided to make the best of this hoard stockpile.

In the process, the below has likely become a new family tradition - fresh cinnamon rolls for breakfast on your birthday.  Since most of the prep is done the night before, it's really not too intimidating to get up a little over an hour ahead of time to allow for final rise and bake time.  Hopefully this new tradition sticks for our family.

Enjoy!


-----


Overnight Cinnamon Rolls


Ingredients

Rolls
  • 1 cup warm milk (105-115 degrees, this is important so check!)
  • 1/2 tablespoon active dry yeast
  • 4 tablespoons granulated sugar, divided
  • 3 cups + 2-4 tablespoons flour, divided
  • 1 egg at room temperature
  • 2 tablespoons unsalted butter, divided and melted
  • 1/2 teaspoon salt
Cinnamon Filling
  • 7 tablespoons unsalted butter, softened and divided
  • 1/4 cup granulated sugar
  • 1 tablespoon ground cinnamon
Cream Cheese Icing
  • 4 tablespoons unsalted butter, softened
  • 4 ounces cream cheese, softened
  • 1/2 tablespoon vanilla extract
  • 1 cup powdered sugar

Directions

In the bowl of an electric stand mixer, add warm milk and sprinkle with yeast.  Let sit uncovered for 7 minutes at room temperature.  Add 1/2 cup flour, and 2 tablespoons sugar, whisk until blended.  Cover with plastic wrap and let rise at room temperature for 35-45 minutes (or in a 100 degree oven for 25 minutes - do not over heat or you will kill the yeast).  Mixture will look puffy.

Whisk in egg, remaining 2 tablespoons of sugar, 1 tablespoon of melted butter and 1/2 teaspoon salt.

Using the dough hook on speed 2, add flour 1/2 cup at a time, letting it blend with each addition.  After 2 1/2 cups, add more flour 1 tablespoon at a time just until dough is no longer sticking to fingertips or the walls of the bowl as it mixes.  Knead for 10 minutes.  Cover with plastic wrap and let rise at room temperature for 2 hours (or in 100 degree oven for 1 hour).  Dough should double in size.

Generously dust flour over a clean work surface and place dough in the center.  Sprinkle dough with flour (just enough to keep rolling pin from sticking) and roll into an even 17"x10" rectangle.  Dot the top of the dough with 6 tablespoons of softened butter and spread it out gently with a spatula. (TRUTH: I suck at this and always damage the dough, so I cheat and melt the butter in a microwave, spreading with a cooking brush.  This does cause the filling to become a little sloppy at roll up time, but it's not terribly unmanageable if you keep the bulk of the mixture away from the final roll edge, and quickly transfer the rolls once you cut them).

Stir together 1/4 cup sugar and 1 tablespoon cinnamon and sprinkle all of it evenly on the buttered dough.  Roll the dough up starting with one of the longer sides, keeping a tight roll.  Once it's rolled up, push ends in slightly to make them more uniform then slice into 12 equal sized rolls.  (Note: some people claim using unflavored dental floss makes this process easier.  I hate that crap, it usually just makes more mess for me.  Instead, I gently cut with a serrated knife, trying to avoid pushing too hard and "crushing" the roll.  Also, since you want evenly sized rolls, cut as follows: slice entire roll into 2 halves, then those portions into 2 halves again - for a total of 4 sections ... then slice each of the 4 sections into 3 rolls each.  It's much easier to make 12 evenly sized rolls this way.)

Butter sides and bottom of a 9x13 baking pan with 1 tablespoon butter and evenly space rolls in pan.  Cover tightly with plastic wrap and refrigerate overnight (up to 18 hours).

When ready to cook, remove rolls from fridge and keeping them covered, let rise at room temperature for 1-1.5 hours (or in a 100 degree oven for 35 minutes) or until puffy.  While this is in process, don't forget to pull out the butter and cream cheese for the icing, to allow it to soften as well.

Before baking, brush tops with 1 tablespoon melted butter.  Bake at 350 degrees for 22-24 minutes or until tops are light golden brown.  Let cool in pan 15 minutes then frost warm buns generously with the cream cheese icing.

How to make icing: cream together 4 tablespoons softened butter and 4 ounces cream cheese.  Once creamy and smooth, add 1 tablespoon vanilla and mix again.  Follow with 1 cup powdered sugar and mix until fluffy (3-4 minutes), scraping down the bowl as needed.

Thursday, May 7, 2020

Recipe: Delicious Breads - Easy Pizza Dough

As I mentioned in my previous posts, I've taken in an exchange student through the end of the school year 2020.  She is scheduled to be with us through mid June.

The below is one of many new discoveries I will post during her stay in my home.  This one, of course, is thanks to the stay home orders and having nothing but time to bake.  Thankfully - or I think thankfully, I am not quite sure - my husband found an online wholesaler of yeast.  So while we were without for about a week once the food shortages started here, we eventually became proud owners of a 2 lb brick of yeast.  Um ... hooray, I think?!

And credit to my student, as she's the one who proposed the recipe to try.

Enjoy!


-----


Easy Pizza Dough


Ingredients
  • 1 1/2 cups warm water (105-115 degrees F - this is important, so check the temp!)
  • 1 package active dry yeast (2 1/4 teaspoons)
  • 3 3/4 cups flour
  • 2 tablespoons olive oil
  • 2 teaspoons salt
  • 1 teaspoon sugar

Directions

After checking for proper temperature, pour water into mixer bowl and sprinkle in yeast.  Allow yeast to proof for 5 minutes or until dissolved (as long as the yeast seems active, it is OK to mix the yeast until dissolved after the 5 minutes are up).

Add salt, sugar and olive oil to yeast mixture and gently whisk.

Starting with the mixer's paddle attachment, add flour 1/2 cup at a time and mix at level 2 until fully incorporated, scraping down the bowl if needed.  When the dough starts to form, switch to the hook attachment and continue adding flour until full amount is mixed in.

Knead dough on level 2 for 7-10 minutes, or by hand.  The dough should be  a little sticky or tacky to the touch when done.  If too wet, sprinkle in a little more flour.

Remove dough from mixer bowl and spread a thin later of olive oil over the inside.  Place dough back into bowl and turn to coat.  Cover with plastic wrap and allow to rise in a warm place for 2+ hours (or place in your oven on the "dough rise" setting for 1-2 hours).  Dough should double or triple in size.

Remove dough from oven if you are proofing there, and begin preheat to 450-475 degrees for pizza cooking.

Sprinkle a work surface with flour, turning the dough to coat.  Divide dough into 2-4 pizzas, depending on volume of rise and your desired finished pizza size.  You can let the divided portions rise for another 15 minutes if you like, or proceed immediately to the next step.

One portion at a time, hand stretch or push the dough into a round shape with a rolling pin.  Sprinkle all surfaces with flour as needed to avoid sticking.  The dough will stretch and contract several times before it holds shape - take time to allow this process to happen.

When desired size/shape has been achieved, transfer dough to pizza pan and top with sauces and toppings.  Bake fully dressed pizza in a preheated oven at 450-475 degrees until edges and toppings have slightly browned, 15-20 minutes depending on size of pizza and volume of toppings.

Tuesday, May 5, 2020

Recipe: Delicious Soup - Easy Carrot Soup

As I mentioned in my previous post, I've taken in an exchange student through the end of the school year 2020.  She is scheduled to be with us through mid June.

Her mild food allergies have inspired me to get back on track and cooking using fresh ingredients.  It's also has challenged me to find new recipes that meet both her needs and my family's pallet.

The below is one of many new discoveries I will post during her stay in my home.  It, in particular, was inspired by some of the things I purchased specifically to keep my pantry stocked during stay home orders ... and to cover for a mistake where I somehow kept buying bags of baby carrots every week and suddenly discovered I had 4 or 5 different bags in my fridge. 


Enjoy!


-----


Easy Carrot Soup


Ingredients
  • 1 tablespoon butter
  • 1 tablespoon extra-virgin olive oil
  • 1 medium onion, chopped
  • 1 stalk celery, chopped
  • 3-4 cloves garlic, chopped
  • 1-2 teaspoons dried thyme
  • 1 teaspoon ground sage
  • 5 cups chopped carrots (or one large bag baby carrots, in my case)
  • 2 cups water
  • 4 cups reduced-sodium chicken broth
  • ½ cup half-and-half (optional - we used non dairy)
  • Kosher Salt to taste
  • Freshly ground pepper to taste

Directions

Saute butter, oil, onion and celery in dutch oven until vegetables are softened / around 5 minutes.  Stir in garlic, herbs, and salt and pepper, cooking until fragrant / about 1 minute.

Add in carrots, water and chicken stock.  Bring to a "lively" simmer over high heat.  Reduce heat but maintain the "lively" simmer for 25-30 minutes.  Carrots should be cooked through and very tender.

Remove pot from heat.  Use an immersion blender to cream the soup.  Stir in cream with a spoon, then blend a second time to incorporate, at the same time ensuring you've blended any stray chunks.  Adjust salt and pepper to taste prior to serving.


Tuesday, April 28, 2020

Recipe: Delicious Dinner - Orange Cauliflower "Chicken"

As I mentioned in my previous post, I've taken in an exchange student through the end of the school year 2020.  She is scheduled to be with us through mid June.

Her mild food allergies have inspired me to get back on track and cooking using fresh ingredients.  It's also has challenged me to find new recipes that meet both her needs and my family's pallet.

The below is one of many new discoveries I will post during her stay in my home.  This is actually one she found and suggested, and I have to say ... it was actually really good!

Enjoy!


-----


Orange Cauliflower "Chicken"


Ingredients
  • nonstick cooking spray, for greasing
  • 2 cups non dairy milk
  • 2 cups all purpose flour
  • 2 teaspoons kosher salt
  • 1 cauliflower, cut into 1 1/2 inch florets
  • 1 tablespoon canola oil
  • 3 cloves garlic, minced
  • 1 piece fresh ginger, minced
  • ¼ teaspoon red pepper flakes
  • ½ cup orange juice
  • ½ cup brown sugar
  • ¼ cup distilled white vinegar
  • ¼ cup soy sauce
  • 2 tablespoons cornstarch
  • 2 tablespoons cold water
  • 1 teaspoon sesame oil
  • white rice, for serving (we used quinoa)
  • 3 scallions, thinly sliced, for garnish

Directions

Preheat oven to 450˚F. Line a baking sheet with parchment paper and grease with nonstick spray.

In a medium bowl, whisk together the non-dairy milk, flour, and salt.  One at a time, dip each cauliflower floret in the batter to coat, letting any excess batter drip off. Arrange the battered cauliflower on the prepared baking sheet, making sure they aren’t touching one another. Lightly spray with cooking spray.

Bake for 30–35 minutes, until the coating is crispy and beginning to brown.

While the cauliflower is baking, make the sauce: heat the canola oil in a medium skillet over medium heat. When the oil is shimmering, add the garlic, ginger, and red pepper flakes. Cook for 2–3 minutes, until fragrant, stirring frequently to prevent burning.  Add the orange juice, brown sugar, vinegar, and soy sauce. Cook for 2–3 minutes, until the brown sugar is dissolved and the mixture begins to simmer.

In a small bowl, stir together the cornstarch and cold water with a fork.  Add the slurry to the sauce, stirring to combine. Simmer for another 2 minutes, until the sauce thickens. Mix in the sesame oil, then transfer the sauce to a large bowl.

Toss the hot cauliflower florets in the sauce until well coated.

Serve the cauliflower over rice (or quinoa) and garnish with the scallions.


Thursday, April 23, 2020

Recipe: Delicious Soup - Split Pea in a Slow Cooker

As I mentioned in my previous post, I've taken in an exchange student through the end of the school year 2020.  She is scheduled to be with us through mid June.

Her mild food allergies have inspired me to get back on track and cooking using fresh ingredients.  It's also has challenged me to find new recipes that meet both her needs and my family's pallet.

The below is one of many new discoveries I will post during her stay in my home.  It, in particular, was inspired by some of the things I purchased specifically to keep my pantry stocked during stay home orders.

And ... with nothing to do with our free time outside of the home ... it paired well with our fresh, homemade sourdough bread.

Enjoy!


-----


Slow Cooker Split Pea Soup


Ingredients
  • 1 one pound bag of dried split peas 
  • 1 large onion, diced
  • 2 medium carrots, peeled and chopped
  • 2 stalks celery, cleaned and chopped
  • 3 cloves garlic, minced
  • 3 springs thyme (I used dried, as I had it on hand)
  • 1 teaspoon ground ginger
  • 1/4 teaspoon crushed red pepper flakes
  • 6 cups broth, low sodium chicken or vegetable
  • Kosher salt
  • Fresh ground pepper
  • Optional: small ham steak (approximately 6" round size), or slow cook with ham bone in soup

Directions

In a slow cooker combine split peas, onion, carrots, celery, garlic, thyme, ginger, and red pepper flakes. Pour broth over mixture, season with salt and pepper. (If you are using a ham bone, you would add it now - remove it prior to blending and shred, then reincorporate it like I mention below for the ham steak).

Cook on high for 4 to 5 hours or low for 6 to 8, until peas are completely soft.

About 30 minutes from serving, use immersion blender to incorporate vegetables fully into soup.  (I prefer a slightly lumpier texture, so I did not blend until fully smoothed.)  After done blending, finely dice warmed ham steak and stir in.  Allow soup to slow cook for another 30 minutes or until ready to serve.


Tuesday, April 21, 2020

Recipe: Delicious Dinner - Summer Vegetables with Sausage and Potatoes

As I mentioned in my previous post, I've taken in an exchange student through the end of the school year 2020.  She is scheduled to be with us through mid June.

Her mild food allergies have inspired me to get back on track and cooking using fresh ingredients.  It's also has challenged me to find new recipes that meet both her needs and my family's pallet.

The below is one of many new discoveries I will post during her stay in my home.

Enjoy!


-----


Summer Vegetables with Sausage & Potatoes


Ingredients
  • 1 pound baby red potatoes, quartered
  • 2 tablespoons olive oil
  • 1/2 teaspoon garlic powder
  • Kosher salt
  • Fresh cracked pepper
  • 1 large onion, chopped
  • 1 red bell pepper, chopped
  • 1 green bell pepper, chopped
  • 1 cups zucchini, chopped
  • 3-4 fresh cloves of garlic, diced
  • 2 tablespoons fresh rosemary
  • 4-6 Italian sausage links

Directions

Preheat oven to 400 degrees.

Toss potatoes in olive oil, garlic powder, salt, pepper, and a portion of fresh rosemary.  When oven is to temperature, begin roasting potatoes.  Roasting will take 45 minutes to an hour, so you can do all other food prep after the potatoes are in to roast. (NOTE: original recipe had you skillet fry the potatoes, but with all the other vegetables I figured this would be a giant mess to stir once everything was in the pot ... not to mention, the potatoes would likely be hell sticking to the pan.  Since I prefer roasted potatoes anyway, with their slightly crispy outsides, I modified the recipe.)

When potatoes are about 15-20 minutes from being done, in a non stick skillet, begin cooking Italian sausages.

In a separate flat bottomed skillet, warm some olive oil.  Add fresh garlic and saute until fragrant.  Mix in chopped peppers and onions, remaining rosemary, and salt and pepper to taste.  Reduce heat on pan and stir until the onions become slightly brown.  Add zucchini and cook about 5 more minutes.

While zucchini cooks, check sausages to ensure they are cooked through.  When fully cooked, slice into bite sized rounds and add to vegetable skillet.  You can add the sausage even if the zucchini is still cooking, the vegetables will gain some flavor from the sausage this way.

When fully roasted, add the potatoes to the skillet.  Stir to incorporate and serve.


Tuesday, April 14, 2020

Recipe: Delicious Dinner - One Pan Mexican Quinoa

As I mentioned in my previous post, I've taken in an exchange student through the end of the school year 2020.  She is scheduled to be with us through mid June.

Her mild food allergies have inspired me to get back on track and cooking using fresh ingredients.  It's also has challenged me to find new recipes that meet both her needs and my family's pallet.

The below is one of many new discoveries I will post during her stay in my home.

Enjoy!


-----


One Pan Mexican Quinoa


Ingredients
  • 1 tablespoon olive oil
  • 1 medium onion, diced
  • 2 cloves garlic, minced
  • 1 jalapeno, minced
  • 1 cup quinoa (I increase this to 1.5 cups to have a little extra)
  • 1 cup vegetable broth (also increase this 1/2 cup if you increase quinoa)
  • 1 (15 oz.) can black beans, drained and rinsed
  • 1 (14.5 oz.) can fire roasted diced tomatoes (I used a larger can with the increased quinoa)
  • 1 cup frozen corn kernels (these can be microwaved separately and added at time of serving if you have food allergies)
  • 1 teaspoon chili powder
  • 1/2 teaspoon cumin
  • Kosher salt and fresh ground pepper to taste
  • 1 avocado, diced
  • Juice of 1 lime
  • chopped fresh cilantro for garnish
  • OPTIONAL: you can top with a little shredded cheese, sour cream, or your favorite salsas.  I'd also think you could easily add in your favorite cooked meat at the end, though I haven't done this yet ... maybe chorizo would add some interesting flavor?  And of course, because I'm always thinking to add more vegetables, I'm debating adding chopped bell pepper in with the onions while they cook ... decisions, decisions!

Directions

Heat olive oil in a large skillet over medium high heat. Add onion, garlic and jalapeno.  Cook, stirring frequently, until the onion starts to sweat, about 2-3 minutes.

Stir in quinoa, vegetable broth, beans, tomatoes, corn (or save corn to the end if you have food allergies), chili powder and cumin; season with salt and pepper, to taste. Bring to a boil; cover, reduce heat and simmer until quinoa is cooked through, about 20 minutes. (If you increase quinoa and tomatoes, you may need to increase your seasoning as well).

Stir in lime juice (and any fully cooked meats, if you choose to add them).

Serve individual portion with avocado, cilantro, and any other toppings as you choose.

Thursday, April 9, 2020

Recipe: Delicious Dinner - Buttered Chicken

Yikes.

In preparing this post, I realized that I haven't published a new recipe idea in over a year.  Which only serves to highlight how poorly I've been managing my diet since I had a baby.


Well, bygones are bygones.  I can't change the past at this point, so I'm not going to dwell on it.

As I mentioned in my previous post, I've taken in an exchange student through the end of the school year 2020.  Which ... now with everything going on, that statement has a very unsure meaning.  I guess I should clarify that she is scheduled to be with us through mid June.

Anyway - our exchange student has some mild food allergies which has inspired me to get back on track and cooking using fresh ingredients.  It's also has challenged me to find new recipes that meet both her needs and my family's pallet.

The below is one of many new discoveries I will post during her stay in my home.

Enjoy!


-----


Buttered Chicken


Ingredients
  • 1 medium-large onion, chopped
  • 3 cloves garlic, minced
  • 1 one inch piece of fresh ginger, peeled and minced
  • 1 tablespoon and 1 teaspoon garam masala, divided
  • 1/2 teaspoon and 1/4 teaspoon ground turmeric, divided
  • 3/4 teaspoon and 1/2 teaspoon ground cumin, divided
  • 2 pounds boneless, skinless chicken breasts
  • Kosher salt
  • Fresh ground pepper
  • 6 tablespoons unsalted butter
  • 1 cinnamon stick (I substituted about 1/2 teaspoon ground cinnamon)
  • 1 tablespoon tomato paste (I wanted extra sauce to cover vegetables, so I used an entire small can)
  • 1 (16 oz.) can tomato sauce (I wanted extra sauce to cover vegetables, so I used an entire 28 oz. can of whole plum tomatoes, blended in a blender with the tomato paste)
  • 1 1/4 cups water (I skipped this due to the extra tomato)
  • 1/2 cup heavy cream (I substituted in So Delicious non dairy creamer)
  • 1 table spoon lemon juice
  • chopped fresh cilantro for garnish
  • serve with basmati rice (or in my case, quiona) and naan bread
  • OPTIONAL: since I always want more vegetables in my dishes, I opted to add in a small bag of frozen cut green beans, and also a drained and rinsed can of chickpeas 

Directions

In a small bowl: combine 1 tablespoon garam masala, 1/2 teaspoon ground turmeric, 3/4 teaspoon ground cumin.  (If you are using the ground cinnamon, you can also add it here.  If you are using the extra tomato sauce like I did, pump up your seasonings just a bit.)  Set aside.

In a large bowl: combine 1 teaspoon garam masala, 1/4 teaspoon ground turmeric, and 1/2 teaspoon ground cumin in a large bowl. Cut 2 pounds chicken into 1-inch pieces, add to the the large bowl, season with kosher salt and black pepper, and toss to evenly coat.

Melt 4 tablespoons unsalted butter in a large heavy-bottomed pot over medium-high heat. Add the chicken and cook until browned on all sides, about 7 to 8 minutes. Transfer the chicken to a plate; it might not be cooked through.

Add the onion mixture to the pan and cook, stirring frequently, until beginning to soften, about 2 minutes. Add the spices from the small bowl, cinnamon stick, and 1 tablespoon tomato paste, and cook 1 minute more.

Add the can of tomato sauce, 1 1/4 cups water, and the chicken and any accumulated juices, and stir to combine. Bring to a boil. Reduce the heat to maintain a simmer and cook until the sauce slightly thickens and the chicken is cooked through, 8 to 10 minutes.

(Since I had the tomato and paste in the blender, I just poured that all in at once instead of putting the tomato paste in with the cooking onions.  I also added in my extra vegetables at this point.  Since my pot was considerably more full, I let this simmer closer to 20 minutes ... partly because I had the quinoa cooking at the same time, and was waiting on it to finish).

Add 1/2 cup heavy cream, 2 tablespoons unsalted butter, and 1 tablespoon lemon juice to the chicken, and stir to combine. Taste and season with salt as needed. Garnish with the cilantro and serve over basmati rice or with naan.

Tuesday, April 7, 2020

St. Pat's Extra Mom 2020

Well ...

A lot has changed since I last posted a blog here.  Weeks ago, I thought I would originally come back with an update that we volunteered to emergency host a foreign exchange student from Belgium.  Turns out, that's just the tip of the iceberg.

Yeah, I've found myself saying "that escalated quickly" quite a bit these days.


Despite the virus and everything else going on, I've tried to maintain a little bit of normalcy around the house.  Easier said than done when Minnesota Government orders a stay home protocol, and only essential work can be completed.  Not to mention I have zero desire to be out in the general public any more than I absolutely have to right now. 

Which means basically no shopping trips for me.

Thankfully, I'm a planner ... and I've had a lot of things in the works for a looooooong time ...


So regardless of stay home orders, I've been able to have a little bit of seasonal fun. Even if I might have spaced out and forgotten to take my usual insta-worthy photos.  Since I've been a little ... disorganized in the chaos as of late ... I totally didn't take ANY staged photos of St. Patty's day stuff. 

Thankfully, I used some of the same things from my Reddit St. Pat's exchange in 2019 as teachers gifts this year, so let's pretend my photoshop Microsoft paint skills aren't garbage and I'll reuse that picture.


Not shown, but also included - a small, green glittered clip in hair bow


Lucky for me, I had purchased a bunch of this stuff in bulk, on clearance in 2018 with the intention of using them as teacher's gifts in the future.  But when 2019 rolled around, I had only used the headbands out of my stash (thanks to stumbling upon $2 clearance bottles of strawberry booze, LOL!). 

While this wasn't as ... impactful is maybe the word? ... as some of my teacher gifts have been historically, all I can do is shrug.  Given the situation, at least it was something.  And aside from that fact, the teachers were all utilizing at least a portion of the gift when I came to do pickup, so it must have been at least a partial success.

---

The night prior, I had given both my son ... and my new "exchange daughter" their St. Pat's gifts so that they could plan them into their outfits for the next day.  Since the local high school was already closed down due to the virus, my exchange student wasn't able to show her swag off to her peers, but she played along and wore it anyway.


The earrings were from Amazon if you're curious, and actually the socks I got weren't actually those ... what I chose had more on them - pots of gold, shamrocks, and I think the heel and trim was actually green ... whatever, you get the idea.

Of course, my son was more than thrilled to wear his gift, despite me not being able to find youth sized St. Pat's socks and defaulting to the next best option in green.  Although his socks might not have been totally on point for the holiday, the rest of his outfit was.  Plus, he came home from daycare covered in shamrock tattoos (he brought them to school to "share"), so he was appropriately festive in plenty of other ways.


Since the socks and other items were fairly small, I had packaged the gifts for the kids in a Target dollar section jute gift bag.  It was similar to this one, but covered in mini lucky charms associated with St. Patty's day like horse shoes and shamrocks.


Since I myself wasn't feeling the most festive due to the stress of current events weighing heavily on my mind, I declined to do too much at work or on a personal level.  I did manage to at least thrown on a pair of fun leggings for work, anyway.  (Yes, I was still being asked to report in to work at that point).


And of course, to round out the day, I served up a crockpot meal of corned beef and cabbage when I got home.  Can't skip that!


So there's my St. Pat's 2020 report.  Mostly normal, but also a little off kilter with everything that started simmering up around that time.  Here's to hoping 2021's celebration is a little better.


Friday, February 14, 2020

Valentines Day 2020

Well ... it's about that time to start talking love and all that mushy stuff.


Or we can skip all that crap and just talk about food.  I mean, why not?


Using that as my segue ... if you recall over the last few years, I've sent my son to school with rather unique Valentine's Day gifts for his classmates.  It all stemmed from his love for his play kitchen when he was just barely old enough to stand on his own ... and his love for bananas.


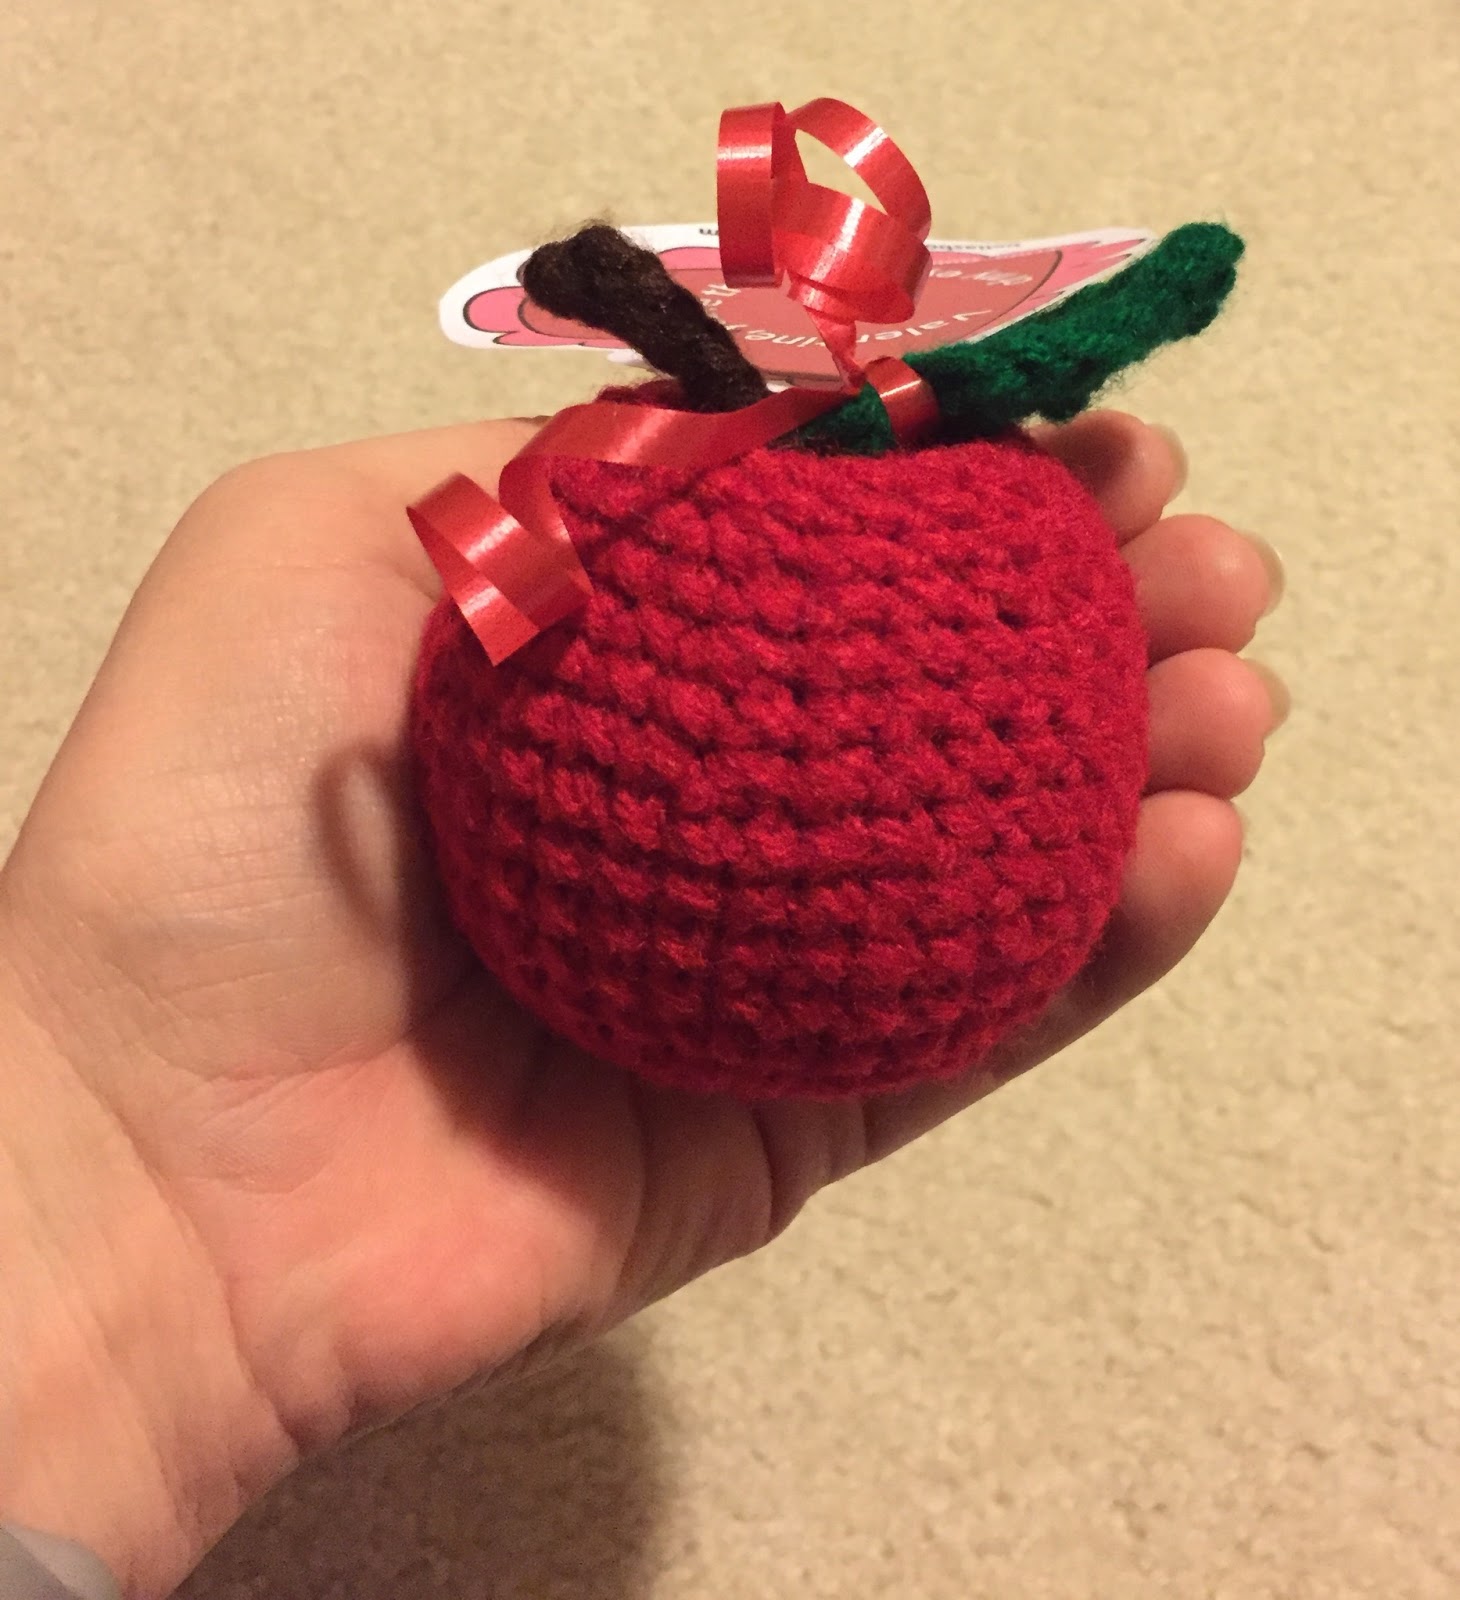
Then, the following year, building on the crochet food collection, apples were the selection.


For 2020, I asked my son about doing another food item and he was excited for it, so ... straying from produce and moving into proteins ...


Yeah, that's a strip of bacon and an egg.  And I must say, while my son is very excited about giving this out on Valentine's Day (case in point, he walked around the house all evening singing "bacon and eggs, bacon and eggs" after helping me kit these up) ... I was a little less than thrilled with the assembly process myself ...


In case you want your own custom play food,
check out BellasBoutiqueMN on Etsy


*Face palm.*  Being cute and unique always comes with a price!  Oh well, hopefully it's worth it, as I have no clue where these actually end up.  I have grand visions of my son's classmates slowly collecting a play kitchen of hand made food items, but who really knows what happens with them after they leave my house?!

Anyway!  With the above completed, I moved on to the teacher's gift.  Which I have to laugh about, because the necklace alone retailed originally for almost $50 ... so when I picked up three necklaces at Nordstrom Rack (along with a pair of zippered wristlets on clearance for a future gifting need), my receipt told me I saved over $330 in retail value.

Well, thank you Nordstrom Rack.  Thank you very much.  Though in real life I'd never pay $50 for this necklace, Baublebar brand or not.


Actually, the Baublebar necklace above was an after thought.  As you saw in my previous Chinese New Year post, I had already lined up a ring dish and jewelry tree set from Target's 2019 Valentine clearance ... and the only reason I added the necklace was because the price was good and it would help demonstrate the purpose of the gift for the recipients. 

In case you forgot, here's the ring dish I previously gifted for Chinese New Year:


And here's the accompanying tree that I intended for Valentine's Day.


Honestly, I think they make a really pretty set.  But that's just me.


Here's the tree, with the necklace attached - and the end result once wrapped.


Yes, I fully admit the gift box ended up being a bit, uh ... largish.  Because the weighted stand on the jewelry tree was so wide, my options were either to put these in an oversized gift box that I already had and only spend $2.99 total on a roll of wrapping paper at HomeGoods - OR - drop something stupid like $4.99 each on an extra wide base gift bag.

So whatever.  I chose overly large gift boxes.  Bigger is better, right?

RIGHT?!

---

Now, you'd think I'd be done spewing information at you by now.  But you'd think wrong.  Because NEW FOR 2020!!!!  I am also going to show you my handy work for my friends and other various gifts.  Because WHY NOT?!?!

So, as you saw in a previous cross stitch post, here's what I made for a few coworker friends.


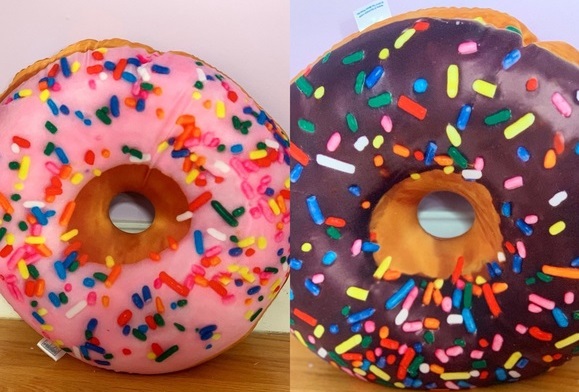
And in addition to that, I picked up some very special socks for my husband and a reversible scented donut pillow for my son.


Because as you well know, nothing says sexy romance like pillows and socks ...

BZZZZZZ WRONG!  THERE'S SOMETHING EVEN SEXIER!!!!!!  BECAUSE I'M GOING TO MONSTER JAM ON FEBRUARY 15TH - just in time for a late Valentine's family date.  LOL!


Oh man, the things you do for your kids.  Wish me luck - and that I keep my hearing the day after Monster Jam.

Happy Valentines Day 2020 everyone!